
構築
1. Lightsail インスタンスの作成
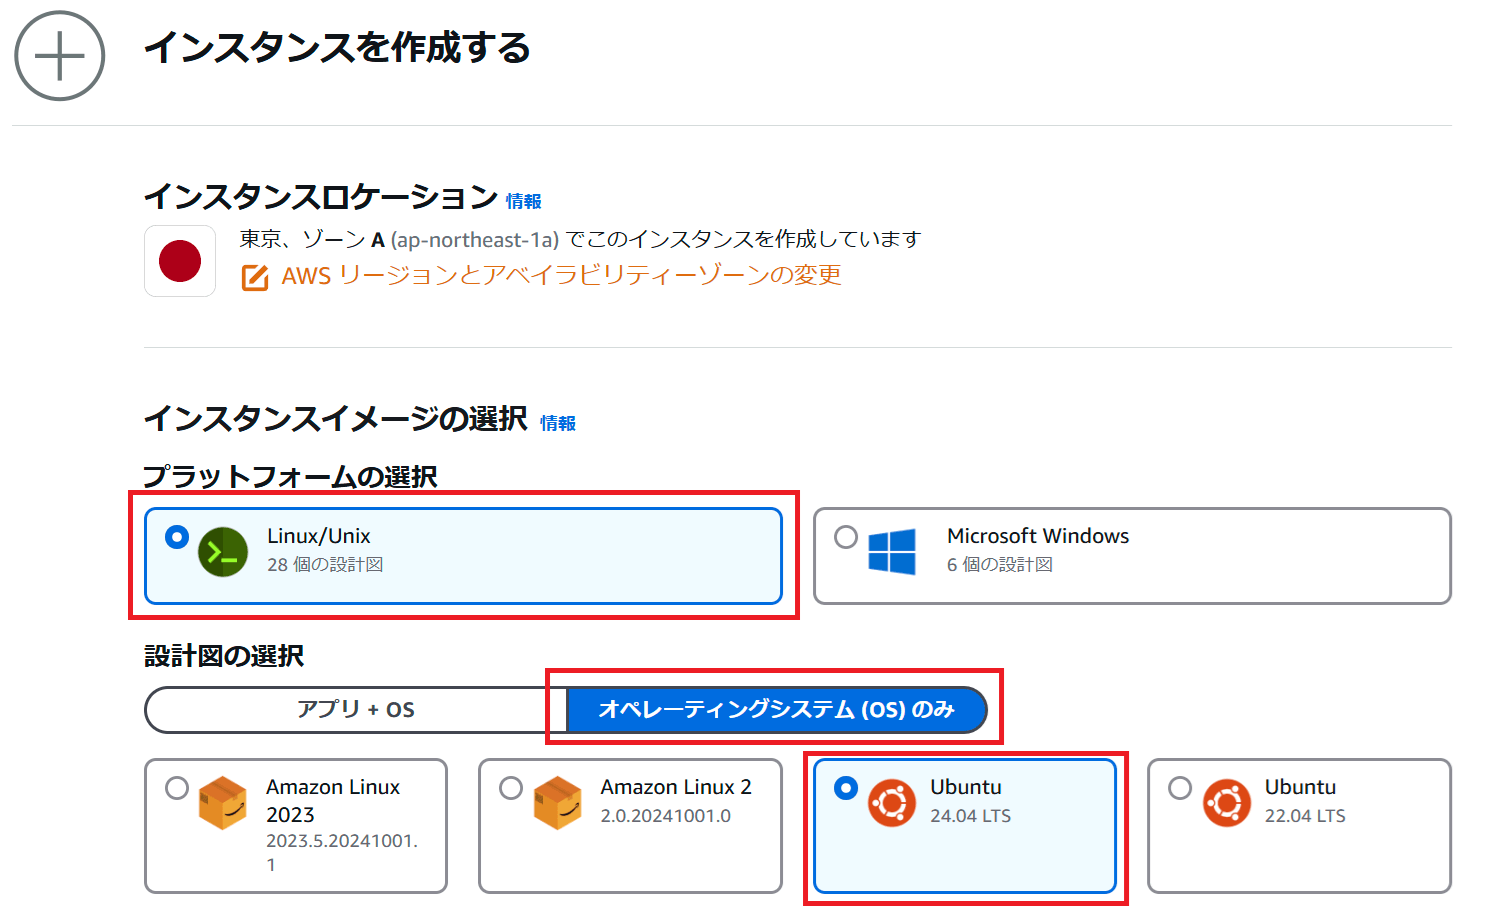
Lightsailのコンソール画面から以下のようにインスタンスを作成します。OSのみのUbuntu 24.04LTSを選択します。
2. 静的IPの作成
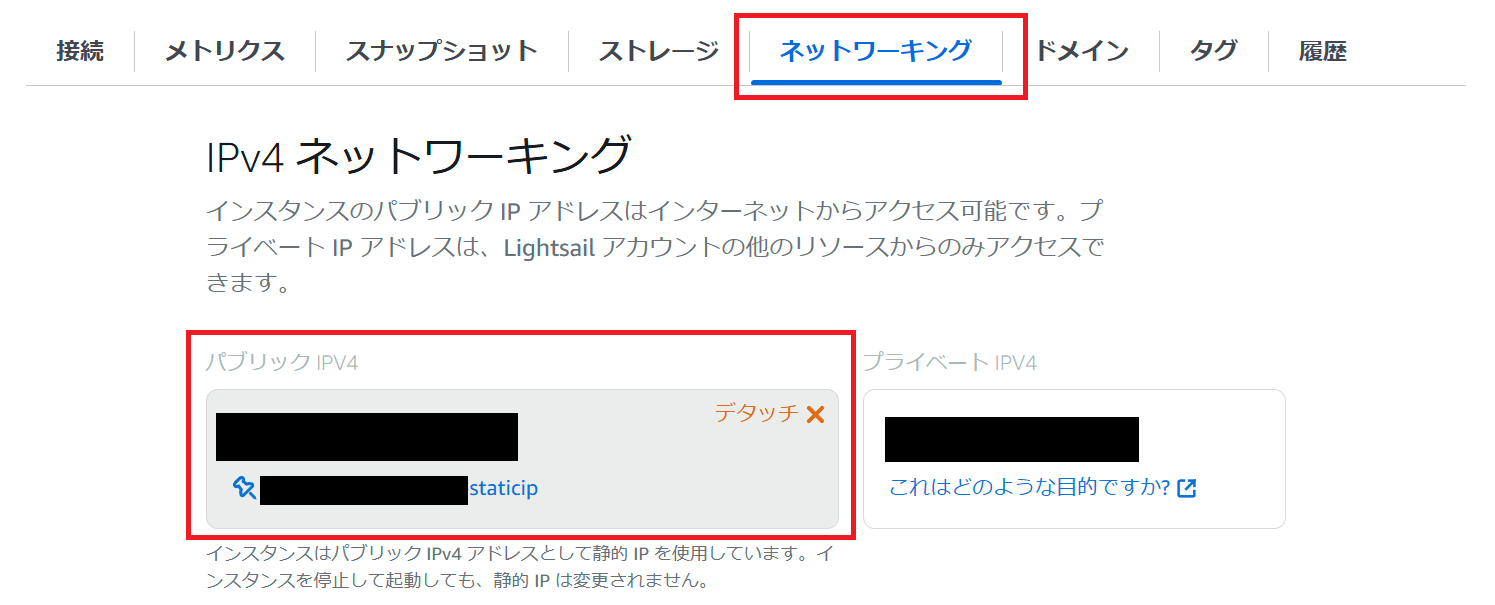
インスタンスを作成後に「ネットワーキング」タブから静的IPをアタッチします。画像は静的IPをアタッチしたあとの設定となります。
3. ファイアウォールの設定
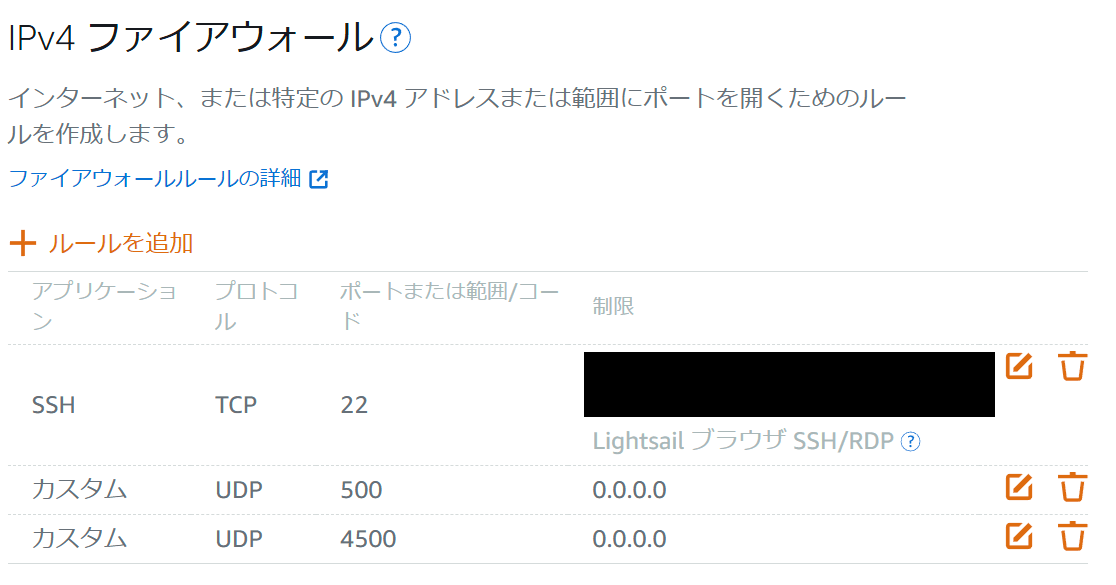
下にスクロールするとファイアウォールの設定項目があるので設定します。
StrongswanはUDP 500, 4500ポートを接続に利用するので、以下のようにAnyで解放します。
4. サーバのセットアップ
sshでインスタンスにログインして、以下の通り実行します。
# 日本語対応 ※任意
ubuntu@ip-172-x-x-xxx:~$ sudo su -
root@ip-172-x-x-xxx:~# timedatectl set-timezone "Asia/Tokyo";
root@ip-172-x-x-xxx:~# apt -y install language-pack-ja-base language-pack-ja
root@ip-172-x-x-xxx:~# localectl set-locale LANG=ja_JP.UTF-8 LANGUAGE="ja_JP:ja"
root@ip-172-x-x-xxx:~# source /etc/default/locale

# ホスト名設定 ※任意
root@ip-172-x-x-xxx:~# hostnamectl set-hostname --static vpn-server
root@ip-172-x-x-xxx:~# echo 'preserve_hostname: true' >> /etc/cloud/cloud.cfg;

# profile 設定 ※任意
root@ip-172-x-x-xxx:~# mv /etc/profile /etc/profile.bak
root@ip-172-x-x-xxx:~# cp /dev/null /etc/profile
root@ip-172-x-x-xxx:~# echo 'export PS1="\[\e[1;32m\][\u@\h \W]\\$ \[\e[m\]"' >> /etc/profile
root@ip-172-x-x-xxx:~# echo 'export PS2="\[\e[1;32m\]> \[\e[m\]"' >> /etc/profile

# Strongswan インストール
[root@vpn-server ~]# exit
[ubuntu@vpn-server ~]$ sudo apt update && sudo apt upgrade
[ubuntu@vpn-server ~]$ sudo apt install strongswan strongswan-pki

# ルート証明書(クライアント証明書)作成
[ubuntu@vpn-server ~]$ mkdir -p ~/workspace/pki/{cacerts,certs,private}
[ubuntu@vpn-server ~]$ chmod 700 ~/workspace/pki
[ubuntu@vpn-server ~]$ sudo ipsec pki --gen --type rsa --size 4096 --outform pem > ~/pki/private/ca-key.pem
[ubuntu@vpn-server ~]$ sudo ipsec pki --self --ca --lifetime 3650 --in ~/workspace/strongswan/pki/private/ca-key.pem --type rsa --dn "CN=VPN root CA" --outform pem > ~/workspace/strongswan/pki/cacerts/ca-cert.pem

# サーバ証明書作成 ※自己証明書で作成
[ubuntu@vpn-server ~]$ pki --gen --type rsa --size 4096 --outform pem > ~/workspace/strongswan/pki/private/server-key.pem
## 以下のPUBLIC_IPはサーバのパブリックIP(2で設定したIP)を指定する
[ubuntu@vpn-server ~]$ pki --pub --in ~/workspace/strongswan/pki/private/server-key.pem --type rsa \
> | pki --issue --lifetime 1825 \
> --cacert ~/workspace/strongswan/pki/cacerts/ca-cert.pem \
> --cakey ~/workspace/strongswan/pki/private/ca-key.pem \
> --dn "CN=PUBLIC_IP" --san PUBLIC_IP \
> --flag serverAuth --flag ikeIntermediate --outform pem \
> > ~/workspace/strongswan/pki/certs/server-cert.pem
# 証明書をStrongswanが認識する場所にコピー
[ubuntu@vpn-server ~]$ sudo cp -r ~/workspace/strongswan/pki/* /etc/ipsec.d/

# Strongswan 設定
[ubuntu@vpn-server ~]$ sudo mv /etc/ipsec.conf{,.backup}
[ubuntu@vpn-server ~]$ sudo vim /etc/ipsec.conf ※詳細は ipsec.conf を参照
[ubuntu@vpn-server ~]$ sudo vim /etc/ipsec.secrets ※詳細は ipsec.secrets を参照
[ubuntu@vpn-server ~]$ sudo systemctl restart strongswan-starter

# Strongswan サービス自動起動有効化
[ubuntu@vpn-server ~]$ sudo systemctl enable strongswan-starter

# IPフォワーディングの設定
## 一時的にIP転送を有効化
$ sudo su -
[root@vpn-server ~]# echo 1 > /proc/sys/net/ipv4/ip_forward
## 永続的にIP転送を有効化
[root@vpn-server ~]# vim /etc/sysctl.conf
net.ipv4.ip_forward = 1
[root@vpn-server ~]# sysctl -p
net.ipv4.ip_forward = 1

# サーバから外にアクセスするための設定
## 事前にパブリックIPアドレスを持つネットワークインターフェースを確認する
[ubuntu@vpn-server ~]$ ip a
## iptables NAT設定 ※これを行わないとインターネットに繋がりません
## ここではネットワークインターフェース名のens5を指定しているが、必要に応じて上記で確認したインターフェース名に変更すること
[ubuntu@vpn-server ~]$ sudo iptables -t nat -A POSTROUTING -o ens5 -j MASQUERADE

## iptables 設定の永続化のためインストール
[ubuntu@vpn-server ~]$ sudo apt install iptables-persistent

## サーバ再起動
[ubuntu@vpn-server ~]$ sudo reboot

## 再起動後もNAT設定が残っていることを確認
[ubuntu@vpn-server ~]$ sudo iptables -L -t nat --line-numbers
> Chain POSTROUTING (policy ACCEPT)
> num target prot opt source destination
> 1 MASQUERADE all -- anywhere anywhere
ipsec.conf
Strongswan VPN接続設定ファイル
パス: /etc/ipsec.conf
leftidのPUBLIC_IPはサーバのパブリックIP(2で設定したIP)を指定してください。
# ipsec.conf - strongSwan IPsec configuration file

# basic configuration
config setup
charondebug="ike 1, knl 1, cfg 0"
uniqueids=no

# Add connections here.
conn ikev2-vpn
        auto=add
        compress=no
        type=tunnel
        keyexchange=ikev2
        fragmentation=yes
        forceencaps=yes
        dpdaction=clear
        dpddelay=300s
        rekey=no
        left=%any
        leftid=PUBLIC_IPはサーバのパブリックIP(2で設定したIP)を指定する
        leftcert=server-cert.pem
        leftsendcert=always
        leftsubnet=0.0.0.0/0
        right=%any
        rightid=%any
        rightauth=eap-mschapv2
        rightsourceip=192.168.1.0/24
        rightdns=1.1.1.2,1.0.0.2
        rightsendcert=never
        eap_identity=%identity
        ike=chacha20poly1305-sha512-curve25519-prfsha512,aes256gcm16-sha384-prfsha384-ecp384,aes256-sha1-modp1024,aes128-sha1-modp1024,3des-sha1-modp1024,aes256-sha256-modp2048!
        esp=chacha20poly1305-sha512,aes256gcm16-ecp384,aes256-sha256,aes256-sha1,3des-sha1!
ipsec.secrets
Strongswan VPN接続用ユーザを管理するファイル
パス: /etc/ipsec.secrets
VPN接続時に利用するユーザのIDとパスワードを登録します。
# This file holds shared secrets or RSA private keys for authentication.

# RSA private key for this host, authenticating it to any other host
# which knows the public part.

: RSA "server-key.pem"
ユーザ名 : EAP "パスワード"
5. スマホでVPN接続
4.で作成したルート証明書(クライアント証明書)をあらかじめスマホにダウンロードしたあと、それぞれのVPN接続設定を行うことで接続が可能になります。
Android ・・・ Strongswanのアプリをダウンロードして、VPNサーバ設定を追加する ※IKEv2 EAP (Username/Password) による接続
iOS ・・・ 設定からVPN構成を追加する ※IKEv2による接続
接続が開始されたらグローバルIPを確認して、静的IPに変わっていることを確認してください。
参考にしたサイト
How to Set Up an IKEv2 VPN Server with StrongSwan on Ubuntu 22.04
https://www.digitalocean.com/community/tutorials/how-to-set-up-an-ikev2-vpn-server-with-strongswan-on-ubuntu-22-04